Showing posts with label baking. Show all posts

Friday, March 22, 2013

Making bagels

I've been on a baking kick lately. That's how I roll -- doing activities in fits and spurts. Maybe it's because of the weather (still wintery) or maybe it's because I'm supposed to be working on a proposal right now and I'm doing everything else but.

So yesterday I made bagels. While bagels have in recent years earned a villainous reputation for being high carb/high calorie, these delicious ringed treats are in a baked good class of their own -- chewy, sometimes crisp, on the outside, and all spongy and doughy on the inside. Toasted or not, topped with butter or cream cheese or just plain, fresh-out-of-the-oven bagels are worthy of an occasional indulgence.


They're also fun and relatively easy to make, especially when you employ the bread machine to make the dough.

The ingredients for my simplest bagel recipe are:

• 1 cup water
• 1 1/2 tbsp sugar
• 1 1/2 tsp salt
• 3 cups bread flour
• 2 tsp active dry yeast

In my breadmaker it takes about 30 minutes to mix the dough followed by a one hour rise cycle, which is useful for times (like yesterday) when I wasn't paying attention to when the mix cycle had ended and I'd wandered off and gotten immersed in some other form of procrastination (cleaning the barn, making potting soil -- anything but the dreaded proposal).

When I finally pulled the dough out it had that lovely soft-as-a-baby's-bum texture, all springy and puffy and alive.

Careful not to handle the dough too much, I gently stretched it into a longish loaf -- not as long as a baguette, but not as plump and stout as a regular loaf. Like a jelly roll.

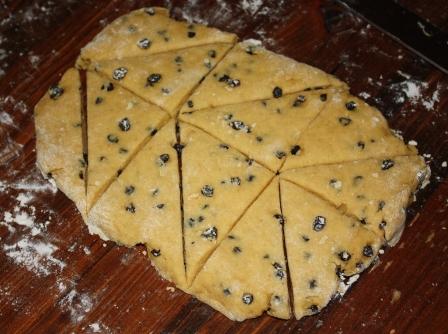
From there I scored and cut the dough into 12 roughly similar-shaped sections. With each piece I gently massaged the dough back into a circular shape (as the cutting tends to flatten it a bit) while pressing a hole through the centre with my thumbs. (A photo here would have been useful but I always seem to be covered in sticky dough and flour at this stage with no little hands around to man the camera.)

After doing this with each piece, I placed the uncooked bagels on a greased tray covered with a clean dishcloth and then placed the tray in a warm spot to rise. (Near the woodstove works well.)

While the bagels were rising, I filled my stockpot halfway with water and about 2 tbsp of sugar and brought it to a rolling boil. When the bagels were ready, I dropped three at a time into the boiling water, simmering for three minutes, turning each bagel once.


I then fished the bagels out with a slotted spoon and placed them on a greased cookie sheet. Then I (or one of my helpers, who had since come home from school) painted each bagel with a beaten egg and sprinkled it with our favourite toppings, either poppy seeds, sesame seeds and onion flakes (our version of the "everything" bagel), or just plain poppy seed.


The last step is to bake at 400°F/204°C for 20 minutes for crispy bagels, less for chewier bagels.

The only bother with making bagels (besides the calories) is that they don't last long around here. That and I still have my dreaded proposal to finish...

Wednesday, March 20, 2013

Baking away my (spring) blues

Yesterday was a cold, blustery and snowy day, one of those chilled-to-the-bone kind of days, so for dinner I cooked a great big hearty and gooey lasagna, served with a side of salad and bread for sopping up every last drop of sauce. As the kids and I raised our glasses and toasted the coming of spring, we said goodbye to Old Man winter and all of its (now tiresome) habits.

Today may be the first day of spring, but it's still cold and blustery and snowing. While some folks in the northern hemisphere are marking today's vernal equinox with seed starting and fits of cleaning, I retreated into my kitchen for some bread making, a decidedly wintery activity. Not to say that I don't bake bread year-round, but there is something particularly nurturing in the way a thick slab of still-warm bread slathered with fresh butter (or not, for you purists) takes the chill off a bitter day, filling the belly and warming the heart.

I have my staple breads -- caraway rye, whole grain, cinnamon raisin, and bagels, which rarely last long enough to see a new day -- but when Miriam at Mucky Boots Farm posted her recipe for Lentil Salad from Still Life with Menu from Mollie Katzen of Moosewood fame, it inspired me to break out of my recipe rut and revisit my cookbook shelf. (And if you're pining for a (virtual) breath of spring, visit Miriam's post on her "United Nations" garden. Get ready to swoon...)

I, too, am a Mollie Katzen cookbook fan, with a fondness for her hand-decorated pages and whimsical line drawings, and her simple mission to make vegetarian food beautiful, delicious and accessible.

I have several of her cookbooks, but I thought I'd try her Sunflower-Millet Bread in her The New Enchanted Broccoli Forest, named after the fanciful yet tasty recipe that features broccoli trees planted upright in a bed of herbed rice pilaf.


While I've long been a fan of baking with seeds, millet is a relatively new-to-me grain, one that is rich in nutrients and provides high-quality protein, B vitamins and minerals. It's also a pretty grain resembling tiny and delicate butter-hued pearls.

It's a time consuming recipe with several steps over several hours: first, you make what she calls a "sponge" with yeast, water, honey and flour and let that rise for 45 minutes, while preparing "the mix" consisting of water, cooked millet, butter, honey and salt. You then beat the mix into the sponge, adding a cup of sunflower seeds and more flour (whole wheat + white), then carry on with the usual kneading, rising, punching, shaping, etc.

There are busy days when I'm quite happy to whip together a quickie loaf of bread and even use the bread machine to do the kneading, rising, punching for me. (Though I always bake the loaves in regular bread tins as I can't stand those giant box-shaped loaves that come out of a bread machine.) But while the end result is a delicious loaf, I miss out on the satisfying, almost spiritual, pleasure of the process.

Then there are times like today when I'm content to putter in the kitchen, working at a slower pace, and experiencing each stage of  the making. Part release of tension, part meditation, I knead the dough until it loses its stickiness and becomes "springy and alive," remembering, writes Katzen, that my job is to "[guide] the dough, making suggestions to it -- not forcing it, tearing it, or otherwise employing intimidation."

It's an exercise in acceptance and patience, about taking time, and not rushing to the next step, which just so happens to produce a subtly flavoured, firm-textured, non-crumbly loaf with a satisfying crunch from the sunflower seeds.

So while soon I'll be spending long days working the soil until it, too, feels "springy and alive," for now I'm content to enjoy winter's last hurrah and with it, its gift of time.

Friday, March 1, 2013

The not-so-sustainable but oh-so-yummy muffin

The first two days of the week were tied up in  deadlines, while the next two were bogged down by yet more snow. While I love, love the beauty of the farm while it's covered in a thick batten of fresh snow, and one of my favourite places this time of year is parked in front of the wood stove (usually with a mug of tea and some knitting), by now I am getting pretty grumpy about this winter thing. This moroseness always hits me this time of year and peaks after my son's birthday the third week of the month.

One activity that always brightens my mood (and heightens my popularity with the rest of the family) is baking -- the delightful fusion of disparate ingredients, the wet and the dry, into cohesive treats that induce smiles and lips smacks and pips of "can I have some more?"

I love trying new recipes and my oft-mentioned fondness for books includes cookbooks, so I recently picked up new one called "The No Grainer Baker" by local author Ann Preston. It may be a small spiral-bound book, but it contains a wonderful cross-section of 45 gluten-free, grain-free baked yummys, such as muffins, cakes, cookies, squares and biscuits.

While none of us has food sensitivities and I'm not baking gluten-free for health reasons or because bread seems to be the latest buzz-worthy diet prohibition,  I am trying to reduce the amount of carbohydrates we eat. Not in an Atkins-type way, but just becoming more conscious of how often we pop some kind of grain in the form of bread, crackers, muffins, etc., into our mouths, especially in the winter. Recent reports have argued that the high glycemic index of bread (which is the comparative effect of carbohydrates on blood sugar, i.e. a high GI number leads to a spike in blood sugar) is a leading contributor to type 2 diabetes,  as well as heart disease and even cancer.

That said, bread make with whole grains, especially heritage grains, versus store-bought flour that's had most of its nutrition stripped and replaced with stabilizers and other synthetics, ranks lower on the glycemic index, say researchers. While I try to bake much of my family's bread, I admit to still using some "conventional" flours (though this blog post is perhaps motivating me to take the next step to sourcing more local grains...)

I've been working my way through the book and yesterday I made some Seedy Nutn' Honey Muffins with our own eggs and honey. Instead of using flour, Preston uses four ingredients: ground almonds, coconut flour, ground flaxseed and psyllium. In addition to that, her recipes calls for the usual -- eggs, brown sugar, honey, buttermilk (I make soured milk), baking powder and soda, plus nuts and four different kinds of seeds: raw sunflower, sesame, poppy and hemp seeds.


While they look like something you'd leave out for the birds, they were absolutely delicious -- sweet but not cloying; moist but not heavy; and seedy without being too crunchy. I liked that the kids thought them a treat, but didn't suffer from any post-sugar infusion crashes afterwards.

I did feel a niggle while baking these in that they're not very sustainable if you're thinking about feeding yourself using local, seasonal or low-impact ingredients. For example, while I can get Red Fife flour from down the road, I don't know any farm in Ontario growing coconuts. But then again, I still drink (fair trade) coffee, treat myself to the odd avocado, and include bananas in the kids' smoothies, alongside with local berries.

While food has become so politicized and an ever spinning carousel of pundits tell us what we should and should not eat, I'm trying to create our own "diet" -- one that is tasty, nutrient-rich, chemical-free, seasonal, local, sustainable and humanely raised, while taking into account the limitations of living in a northern climate. It's still a tall order, but I think it's important to at least consider these criteria when selecting ingredients and recipes. I'm by no means a purist, and some might call me hypocritical as I often feel like I'm working with a moving target, but it can be exhausting, overwhelming and downright paralyzing to vet every morsel of food that comes into my kitchen. (Still, there are some places I won't compromise -- I refuse to buy factory-farmed grocery store meat anymore, for example, because I will not support a system that is predicated on the extreme and long-term suffering of animals and the degradation of our planet.)

Perhaps rather than preach a particular food dogma, we need to get back to to enjoying, no celebrating, food as something more than just fuel for the body. And sometimes that means baking a really delicious muffin, coconut flour and all.

Tuesday, February 15, 2011

How (not) to make granola

I'm always looking for ways to create wholesome, nourishing food for my family and save money at the grocery store. Both my kids love eating cereal for breakfast but with all the empty-caloried, sugar-filled yuck on the market, there are only a few brands that we'd buy -- and these don't come cheap. So I started making my own.

Here's our favourite wintertime cereal recipe : a simple Honey Almond Granola, filled with nutritious grains and crunchy nutty goodness, kissed with a hint of sweet and a dash of love.


I get most of the ingredients at the bulk food store, except for: the honey, which my dad buys from a local farmer (until we get our own hives buzzing); the vanilla, which we make ourselves from vanilla beans; and the vegetable oil. But I'm getting ahead of myself.

First, here's the recipe:

• 4 cups large flake rolled oats
• 1/2 cup oat bran
• 1/2 cup wheat germ
• 1/2 cup unsweetened large flake coconut
• 1/4 cup sunflower seeds
• 1/4 sesame seeds, not toasted
• 1 cup unsalted raw almonds, roughly chopped
• 1/2 cup honey
• 1/4 vegetable oil
• 1-1/2 tsp vanilla extract
• 1 cup golden raisins *
• 1 cup dried cranberries *
• 1/2 cup dried currants *

* or dried fruit of your choosing

1.) Preheat oven to 325 degrees F. Have ready two heavy-bottomed baking sheets.

2.) Stir together the rolled oats, oat bran, wheat germ, coconut, sunflower seeds, sesame seeds and almonds in a large bowl and set aside.


3.) Stir the raisins, cranberries and currants (or dried fruit of your choosing) in a separate bowl. Marvel at how pretty and festive it looks. Set aside.


3.) Place the honey in a small pot and heat until melted. Add the vegetable oil and vanilla extract and stir until combined. Pour over the rolled oat mixture and stir until the grains are evenly coated with the honey mixture.

4.) Do not get swept away by your six-year-old's insistence that we should add the berries now because it would look oh-so-pretty.


5.) Do not spread the mixture out on the two baking sheets before re-checking the recipe.

6.) Do not spend the next 20 minutes hand-picking all the 'pretty berries' from the grains and cursing the recipe for having 2-1/2 cups of assorted dried fruit in it. Do not notice the pursed lips in the photo posted below.


7.) Do not give up and decide to bake the granola anyway, covering the baking sheets with tinfoil and hoping for the best. Do not ignore the scent of roasting cranberries/raisins.


8.) Skip steps 4 through 8.

9.) Divide the grains and honey mixture without the dried fruit onto the two baking sheets. Place in the oven without the tinfoil and bake for approximately 20 to 25 minutes, stirring frequently. When ready, oats (but not the dried fruit) should start to turn a light golden brown. Check often as it can burn quickly.


10.) Remove from oven, cool and place mixture in a large bowl. Only then add the dried fruit mixture and stir until well combined.


The recipe makes about 12 cups and keeps up to four weeks, but it never lasts in our household that long.

Even with the 'oops', this hearty granola tastes delicious topped with with hemp seeds and served with your choice of milk. Or not. Lucas takes his straight up, sometimes with yogurt -- if he's feeling adventurous.

If you haven't already, be sure to visit my Valentine's Day Giveaway post for a chance to win a copy of Louise Riotte's 'Carrots Love Tomatoes!"

Friday, February 11, 2011

Bulk store goodness & my soon-to-be first giveway

While my blog posts are often lengthy sagas (who knew someone could write so much about knitting one sock?) this will be a quick one: I've got a pile of work to get through, the barn is in a sorry state, I just picked up two more balls of sock yarn (I'm going to need a knitting intervention soon, I think!), I've got two kids that'll be home from school in less than three hours and I've got a date with my kitchen*. Oh, yes... I've been at the bulk food store.


I love the bulk food store with its rows of bins brimming with culinary possibilities. There's nothing prepared, no preservatives or additives -- just good old fashioned ingredients that encourage creativity in the kitchen.

I stocked up on some rye flour and Red Fife flour for some home-baked bread, rolled oats, nuts and raisins (golden ones, no less -- so sunny and cheery!) for granola, carob powder and poppy seeds for cookies (not together!) and I couldn't resist getting some delicious dried lavender blossoms. I'd like to make each of us an aromatherapy rice bag, perfect for taking away the chills or for soothing aching muscles. I've got to figure out a way to heat it without using a microwave -- perhaps a double boiler on the woodstove?

While I must dash, be sure to visit on Monday for my first giveaway! Curious? I'll give you two hints.

Take this...


and add some of this...


Have a lovely weekend!

* Just to be clear -- I'd much rather prefer a date with my husband, but it is the middle of a workday, after all...

Wednesday, February 2, 2011

Baking up our own storm

It’s here. Weatherman said there was a big storm coming. It even has a name -- the “Groundhog Day Storm” -- and it’s expected to dump anywhere between 20 cm and 30 cm of snow in 24 hours. It's hitting hit hard and fast. Outside my window the flakes fall and swirl like those from a snow globe; the scene is achingly beautiful, but deceptively treacherous. Snow is blowing into huge drifts, smothering our farm with an icy blanket, finding its way into every crook and cranny. Snow’s tricky that way.

Since moving to the country, the weather has earned my respect for its sheer power, ruthlessness and beauty. A storm like this out here, in the middle of nowhere, is a call to action. We’ve got the pantry stocked, a pile of my dad's homemade beeswax candles at the ready, the barn is battened down and in case the power goes out, the generator is on standby with several jerry cans of fuel.

The whole farm crew is home today – kids have a snow day and Lucas couldn’t get into work. It’s easy to get cabin fever when hankering down under one roof. Our solution? We’re baking up our own storm.

I’ve made some whole wheat date oatmeal cookies…


…and a loaf of Apple-Raisin Spice Bread.


Lucas whipped up his famous (infamous?) Gonky Balls….


… and he’s making some Portuguese corn bread rolls to accompany tonight's vegetarian chili. Comfort food makes everything better, doesn't it?


But the most fun was making these amazing and so simple Wheat Germ Scones.

Here's the recipe:

• 1/2 cup wheat germ, divided
• 1 1/2 cups flour
• 2 tablespoons packed brown sugar
• 1 tablespoon baking powder
• 1/2 teaspoon salt
• 6 tablespoons butter
• 1/3 cup currants
• 2 eggs
• 1/4 cup milk

1.) Preheat oven to 425 degrees F. Reserve one tablespoon wheat germ. Combine remaining wheat germ, flour, sugar, baking powder and salt in a large bowl.

2. Cut in butter with pastry blender (or two knives) until mixture resembles coarse crumbs. Stir in currants.

3.) Beat eggs in small bowl. Add milk; beat until well mixed. Reserve 2 tablespoons milk mixture. Add remaining mixture to flour; stir until mixture forms soft dough that leaves the side of the bowl.

4.) Turn out dough onto well-floured surface. Knead.


5.) Roll out dough into 9" by 6" rectangle. Cut down into six (3") squares. Cut each diagonally in half, making 12 triangles.

6.) Place triangles 2" apart on ungreased baking sheet. Brush triangles with reserved milk mixture and sprinkle with wheat germ.

7.) Bake 10 minutes until golden brown. Serve immediately with a dollop of butter. Eat three more in quick succession.


While our backs may ache from shovelling (our plough is in the shop -- brilliant timing, I know!), but we're sure to have full bellies from all this home-baked goodness!

For folks who have to work and travel today, a snowstorm like this can be a major inconvenience and even scary. But on days like this, where there is nowhere else to be but here, I feel such gratitude to have created our own refuge from the storm.

Friday, June 18, 2010

Natural baked goodness: whole wheat cinnamon buns

With the chicken drama behind me for now (and thanks again to everyone who talked me through it -- your understanding and support means so much!), I thought I'd finally write that post on whole wheat cinnamon buns.

It was another cold and rainy day on Wednesday so Ella and I decided to do some baking to warm up the kitchen, our hearts and our bellies!

I have another new/used book that I've been excited to try out: the Home Bakebook of Natural Breads & Goodies, by Sandra and Bruce Sandler.


Published in 1972, it contains recipes for yeast bread, sourdoughs, rolls, quick breads, cakes, cookies, pies & puddings, using whole grain flours such as whole wheat, whole rye, soy flour and cornmeal.

Even in the early 70s, the authors noted there was something amiss with the "food" modern families were buying:

"Few things are as enjoyable as spreading fresh sweet butter on hot bread straight from the oven. And, few store or bakery bought breads are quite as nutritious as home baked breads with whole grains and organic ingredients... The pale, squishy supermarket product certainly cannot be the food that supports life. It has all it can to support a knife of firm peanut butter."
We've been baking our own bread for a while now but I've got a confession to make: I've been using my bread machine for the making part.

I know, there's nothing "wrong" with that, but I do believe part of the experience of making bread from scratch is lost with the use of a machine.

I've been intimidated by the kneading and rising part. But that's where the connection to the handmade really blossoms, doesn't it?

Since this is a skill I want my children to have I decided to get over myself and just try it.
First you have to prepare the dough for dinner rolls.
You need:
• 1 tbsp dry yeast
• 1 -1/2 cups warm water
• 3 tbsp raw organic sugar
• 1 tsp sea salt
• 2 tbsp (melted) butter
• 1 egg
• 3 to 4 cups whole wheat flour

1.) In a large bowl, sprinkle the yeast over the water. Allow the yeast to dissolve, about five minutes.

2.) Stir in the sugar, salt, butter and egg. Slowly stir in the flour until the dough pulls away from the side of the bowl

3.) Turn the dough out onto a floured board (or table) and knead until it feels elastic, about 5 to 7 minutes. It took closer to 10 minutes for us but that's because little hands were eager to help.


4.) Roll the dough into a rectangle about 9" x 18".


Jack came home from school just in time to help with the next part - yay!

5.) Brush the dough with 1/4 cup melted butter.


6.) Mix together 1/2 cup raw organic sugar and 1 tbsp (or more!) cinnamon. Sprinkle this mix over the butter.


7.) Roll the dough jelly-roll fashion into a cylinder about 18" long.


8.) Cut the roll into 1" slices.


Jack thought the inside swirl was really neat and deserved a close-up so you could appreciate its neatness too!


9.) Place the slices cut side down fairly close to each other in buttered cake pans. Cover with a clean dish cloth and allow to rise until about double in size.

It worked!


10.) Preheat the oven to 350 degrees F. Bake for 25 minutes or until brown.


The verdict: A resounding success! While store-bought cinnamon buns are made from white flour and are dripping in icing, these have a wonderful heartiness to them. Not too sweet but oh so good! I think the next time, I might try even a bit more cinnamon and I might pop in a few raisins. Enjoy!

Thursday, June 10, 2010

Healthy treats - Bounty Bars

It was a drizzly and cold day yesterday so I couldn't get out in the garden. I was feeling under the weather so I couldn't clean out the barn.

I could, however, try out my new/used recipe book: Snackers by Maureen & Jim Wallace.


Published in 1977, it's full of recipes for everything from bars and squares to cakes and cookies, pies and pastries and even "soft" drinks (that are more like smoothies and shakes), using healthy, natural ingredients: no refined sugar, no artificial colourings, no imitiation flavourings, no chemical preservatives.

I love the dedication at the front of the book: "To the children, whose feet, we hope, will tread the path that is paved with good nutrition." Given that this book was written in the late 70s and having looked at the crap that goes into many families' grocery carts and school lunches nowadays, I fear many children still have a long way to go.

Pure food? I say, bring it on.

While my kids can't take anything with peanut butter to school due to an allergy alert (many schools are peanut-free zones) I thought this recipe for Bounty Bars would make a good after- school snack.

What's more, I had all of the ingredients.


You need:

• 3/4 cup natural peanut butter
• 1/4 to 1/2 cup honey
• 1 tablespoon milk (cow, soy, rice or almond milk should be fine)
• 1 well-beaten egg
• 3/4 cup rolled oats
• 1/2 cup unsweetened shredded coconut

1.) Cream the honey and peanut butter; add the milk and egg, mix well. Add remaining ingredients.


2.) Pat into lightly oiled/buttered 10" square baking pan (I used a rectangular 10" x 8" pan). Mixture should be about 1/2" deep (mine was a bit thicker, so I baked it longer)

3.) Bake at 350 degrees for 10 to 15 minutes. When I pulled it out of the oven, it had a brownie-like look it it -- kind of soft and bubbly. But as it cooled, it hardened a wee bit.


4.) Cut into squares and serve.


The verdict: I used the lesser amount of honey and my kids found it a bit dense at first. But then I drizzled just a tiny amount across the top and that was it, they loved it!

The squares are quite crumbly, so they'd probably fall apart in a school lunch or picnic but they're perfect for an at-home treat.
Related Posts with Thumbnails