Showing posts with label local eating. Show all posts

Tuesday, June 7, 2011

Growing under glass: a cold frame update

I realize it's been ages since I've written anything about what's growing in the cold frames.

My last post was in late April, when the spinach was in its just-sprouted stage and the parsley hadn't even germinated yet.

That was then:

And this is now:


And taking a peek in the leaf lettuce and mesclun mix box... then:

And now:

I still find the transformation extraordinary -- from seed to food in just seven weeks! I know the argument for shopping at the grocery store is the "convenience" but really -- growing greens this way isn't just convenient, it's easy and so much more delicious that soggy or wilted store-bought produce.

And given all the battles that I'm waging in the kitchen garden with the weeds and the grass and the bugs -- not to mention managing these wild weather swings -- this cold frame growing seems so much more civilized.

Even Jack and Ella have been a great help with harvesting greens...


... and making delicious salads for some zero-mile inspired dinners, such as this one featuring homegrown eggs, herbs and asparagus.

Ella especially has embraced visiting the cold frames and bringing in a basket for each meal -- "just like in the pioneer times, mama."


The one lesson we learned is this: the props that we use to hold the windows open need to be more secure.

This one was the victim of an unruly gust of wind that lifted the open window and dropped it on the frame base, smashing it and beheading the lettuce and onions beneath it. As the bed is completely contaminated with glass, I think I'll let everything go to seed (the mesclun mix is already there) before removing all the soil and starting again.

On the whole, growing under glass has been a hugely rewarding experience and as the weather heats up and these greens near the end of their growing season, I can't wait to see what grows next.

Friday, June 3, 2011

Rhubarb made three ways

One of the things I love about growing food is that my kids get to experience the full spectrum of local, in-season eating -- the waiting, the watching, the harvesting and the eating. Ever since we discovered the pleasures of rhubarb last year, Jack has been eyeing up rhubarb row, waiting for the time when we can once again pick some fresh 'barb.

While asking the children to help me dig up weeds is like pulling teeth, it was lovely to see them embrace the task of leafing through the rhubarb patch in search of the most tender and ruby-red stalks.

The is just the first of many, many baskets.

The kids asked if they could eat the stalks raw, to which I replied, "sure!" What I didn't tell them was just how tart and tongue twisting it tastes!

As they chewed, they scrunched up their faces like they'd been sucking lemons. It didn't take long before they spat out their mouthfuls and declared that while they both liked rhubarb baked "in things", raw was just "gross."

This easy-to-grow perennial can be quite prolific, so I've been on the lookout for recipes that will make the most of our delicious bounty.

I recently found one for rhubarb cinnamon muffins, made with whole wheat flour and two cups of diced rhubarb. They're a lovely not-too-sweet afternoon snack, tasting more bread-like than muffin-like, and studded with chunks of rhubarb that deliver its unmistakable tangy smack.


I also found a new recipe for rhubarb crisp (Jack's favourite); one that has the oatmeal crust on both the top and bottom. This recipe takes four cups of rhubarb and I'm going to try freezing several trays of it to enjoy later in the year.

But this season's greatest taste-tingling surprise was rhubarb juice -- a delicious twist on the traditional pie/crisp arrangement.


If you like the tartness of rhubarb, you'll love the puckery pleasure of this juice. It's a concentrate, with a 1:1 mix ratio, which we've added to water, orange juice and even ginger ale for a bubbly treat. I'm sure it would make a lovely addition to a tonic-based cocktail, too.

Here's the recipe for basic rhubarb juice concentrate:

• 12 cups sliced rhubarb (1" slices) (yes, 12 cups!)
• 4 cups water
• 1 1/2 cups granulated sugar

1.) In a large stainless steel pot, combine rhubarb and water.* Bring to a boil over medium-high heat, stirring constantly. Reduce heat, cover and boil gently until rhubarb is soft, about 10 minutes.**

2.) Transfer to a strainer lined with several layers of cheesecloth over a deep bowl. If you don't have a strainer handy, raid your husband's workshop for clamps and attach the cheesecloth directly to the pot. We're really high tech around here. (Those clamps are cleaner than they look.)

Let drip undisturbed for about 2 to 3 hours, or until all the liquid has drained.


3.) In a clean stainless steel saucepan, combine rhubarb juice and sugar. Heat to dissolve sugar but do not boil. Remove from heat and skim off foam.


At this point, you can choose to can the juice (ed. update: via boiling-water canner), but I left one jar in the fridge and froze the second one in a few smaller plastic yogurt containers. It's a delicious, vitamin-packed way to capture one of spring's earliest seasonal pleasures. Enjoy!

* If you want to make "Sunshine" rhubarb juice, add the grated zest of one lemon and one orange.
** Once you remove from heat, add juice from one lemon and one orange.


P.S. No post would be complete without a new duckling photo. We're up to four now. Yep, four.

Wednesday, April 20, 2011

Test driving an idea

I've written about my dreams of making this a working farm again; to grow food that nurtures others, as well as ourselves. I'm a long way from that dream as I still have so much to learn, but I think I'm coming closer to figuring out what comes next.

I've said that it's easy for me to come up with ideas, especially with all the reading and research I do. It's a trait/hobby/compulsion that members of my immediate family find both enamoring and infuriating, especially whenever I start a sentence with, "I've been thinking and..."

I've had an idea bouncing around my noggin for the past few weeks so I thought I'd give my family a break and "test drive" it with you folks instead, and humbly ask for your thoughts, suggestions and feedback.

One of the family farm models that is growing in popularity is the CSA, or community supported agriculture. Farms that use a CSA model sell shares before the growing season in return for delivering a set number of weeks of farm produce. As an example, one share, worth say $500, would give the consumer 18 weeks of in-season vegetables. The benefit to the farmer is obvious -- he or she can anticipate how much food to grow based on the number of shares sold, thereby reducing the risk.

The most successful CSAs grow a wide diversity of produce to keep the food baskets full throughout the entire season. Even if you collaborate with other farms in co-operative arrangement, this can be a lot of work and even more logistical juggling. It's also a big commitment, one that I'm not confident enough to make yet.

However, I recently read about a farm that in addition to its regular CSA program, offers a season-specific program; namely a Thanksgiving CSA share.

The way theirs works is that members receive a package of winter squash (5 - 10 lbs), potatoes (5 - 7), onions (3 - 4) and a pasture-raised heritage turkey, minimum weight of 8lbs at $5/lb, for a total base cost of $60.

What I liked about this model is that the farmer gets the benefit of a commitment from the share member, plus the upfront payment, and it's a one-shot delivery deal, versus 18 to 20 weeks, or more. One obvious downside is you have to sell a lot more shares at $60 a pop than you would for one full-season share.

So I started thinking, what if I offered two different sizes of shares: starting out with a basic share like this one, and then adding a second, larger share, that would offer the basics plus extras such as more root veggies, beans, a pumpkin, herbs, garlic, and perhaps other locally-sourced goods, for a true 100-mile/local Thanksgiving meal.

I'm crunching the numbers right now (yes, my brain is aching something fierce!), considering...

~ the cost of a turkey poult ($7.01 for a day old Orlopp Bronze, $11.38 for a three-week old started bird)
~ the feed costs (grower is approximately $17.50 for a 20 kg (I think) bag, and you need 2.5 lbs of feed for every 1 lb of live weight)
~ and the feed-to-weight conversion rates (Orlopps process at 75% of live weight, reaching 12 lbs at 12 weeks for hens (16 weeks for Toms) to a maximum of 22 lbs at 20 weeks for hens (35 lbs for Toms))
~ Ed update: Blogger Mama Pea reminded me that I'd need to consider the cost to process the birds to get them oven ready

... and then trying to figure out the per pound weight, plus profit, that I could charge, as well as the unit costs of all the veggie goodness.

For this season, I'm thinking of trying this for ourselves: raising a few turkeys and growing everything we'd need four our own homegrown Thanksgiving meal. Maybe I'll discover that I don't like raising turkeys (are they really as stupid at my reading suggests? Can they really lose track of where their feeders are, or drown in a rainstorm? I don't know how much more dysfunction this farm can take!) or that the numbers simply don't work out.

Or maybe this could be one way that our farm starts giving back and contributing to our local food economy. But for now, it's simply food for thought.

What do you think? Would you consider buying a Thanksgiving CSA share? What would you want in a basket? And what price would you consider paying?

Wednesday, June 30, 2010

More strawberries!

Since Jack missed out on last week's picking adventure, we decided that for their first day of summer vacation the three of us would celebrate by going back to the strawberry farm. There is only a week of strawberry season left -- if that -- and the next few days are silly busy with Canada Day celebrations, a day trip to a friend's cottage and then a weekend of fishing with dad, his brother and the cousins.

And yes, I'm really looking forward to getting back to our slower pace of living next week.

What I love about trips like this is the opportunity to observe how different my kids are in the same situation and how their individual personalities and styles-of-being manifest.

Jack took a somewhat relaxed attitude towards picking, being completely at ease working close to the earth.

Ella, on the other hand, who's already done this picking thing before, decided that today would be a day of whirly-girly silliness. No armed picking? No problem. Goofy girl.


When placed in a new situation, Jack has always been my quiet observer; watching, assimilating information and then taking careful, purposeful action. I could see this today as he gently picked through the strawberry plants, looking for the "ruby red" berries, and asking several times, "Is this one okay, mum?"

Of course, it didn't take him long to get the hang of picking and he quickly filled his allotted basket with "nature's candy," as he called it.

Unfortunately, Ella's whirly-girly silliness quickly got a bit out of hand. Perhaps I'm a bit of a stickler here but a u-pick farm, in my humble opinion, is not a playground (or a race track or a hurdle course) and the picking area should be respected as a source of our food and of a farmer's livelihood. Ella didn't agree with my assessment and quickly deteriorated into a whiny, obstinate little creature.
Please tell me I'm not the only parent to ever order a time-out at a u-pick.

Thankfully, the sulkiness didn't last long and once again I had a crew of happy pickers.

It's a good thing too because we had a lot of strawberries to pick today!

Not a bad harvest -- just over 20 lbs.

Now all I need is an extra set of hands, or two, to help me make another three batches of jam. And then we need to prepare the berries for the freezer and the dehydrator and then we can make some fruit leather and...
What do you mean you're off duty? What do you think this is... summer vacation or something?
Oh, right.

Tuesday, June 29, 2010

Slim pickings

The house that I grew up in had a big picture window above the kitchen sink. I always knew I wanted the same when I found my "forever" home so I was thrilled to find our farmhouse had such an arrangement.

The backdrop to my window view is largely a mix of towering cedar and birch trees, with the bunkie off to the left and the vegetable garden off to the far right. Front and centre is a lovely mature raspberry bush.


Despite looking a bit bedraggled, we were still treated to some delicious berries last year. I wasn't sure what to expect this year as raspberries are biennial but I pruned the canes back in the spring, put down some more straw to keep down the weeds and hoped for the best.

After last year's raspberry escapade, the kids were pretty excited to finally go picking -- but they had a hard time finding more than a tiny handful of dark berries.


With spring coming three weeks early this year, I noticed fruit forming earlier than last year. Unfortunately, this coincided with the early arrival of my nemesis -- the Japanese Beetle, which decimated my roses, peonies and has been seen buzzing around my vegetable garden.

Looks like these beasties found the raspberries too. Can you see the skeletonized leaf? Nasty.

I'm not sure if the beetles are the only reason for our slim pickings this year. Perhaps the canes are too old or maybe the soil needs some TLC. There are still some immature berries on the bush that'll make a nice topping for some homemade yogurt but that's about it.

But this paltry harvest helped reinforce the connection between the growing of food and what shows up on your plate. It was like a mini lesson in crop failure without the hardship and empty bellies. It taught the kids to appreciate what they did pick and not take it for granted.

Together, we're going to do some research so we can figure out how to increase our yield for next year -- but only after we visit the strawberry farm again to get our fill of berries.

Saturday, June 26, 2010

Garlic scapes

I love garlic. Not only is it so good for you and wonderful to cook with, but it's relatively easy to grow -- simply plant the cloves in the fall, tuck them in under a thick layer of mulch and come spring, celebrate their arrival as one of the first garden edibles to make an appearance.

While much attention is paid to what's underground -- the white papery bulbs -- there's an often overlooked delicacy: the garlic scape.

Scapes are the curly whirly flower stems that the garlic produces before the bulbs mature.

It's a good idea to harvest the scapes when they're still young and tender, shortly after they curl, to help direct the plant's energy towards making a bigger bulb.

Simply trim the base of the stem and the flower tips (though I understand some folks eat these parts too). I've read that it's better to harvest scapes in the afternoon so that the wound heals quickly.


Young and tender scapes can be eaten fresh but we found they still had too much of a burn for our palates.

However, steamed for five minutes and then tossed with a bit of butter and a sprinkling of sea salt and oh my, we had a delicious side dish that even the kids gobbled up.


Thanks to my friend at A Little Crafty Nest for teaching me about the delicious scape!

Wednesday, June 23, 2010

Easiest strawberry jam recipe, ever!

I love good tasting preserves: jams, jellies, chutneys -- you name it. In fact, one of my earliest farm-to-kitchen connections lies within a sweet memory of strawberry freezer jam.

One of my best friends from grade school always had the yummiest jam sandwiches. The fruit was chunky and perfectly sweet, not the sugary, cavity-inducing smack I was used to in store-bought jam. When she told me it was homemade, I remember thinking, "You can do that?"

My mum was a creative cook, but not a preserver. So when my friend invited me over to share in her family's jam making day, it was an eye-opening and fascinating experience for me.

I don't have very clear memories of the actual process, beyond marvelling at the redness of the berries and the wonder of actually making your own jam. I do remember bringing home a few yogurt containers filled with berry goodness and carefully rationing them because I knew when the last container was empty, the jam was gone until next year.

While I didn't realize it at the time, it was my first life lesson of eating in season.

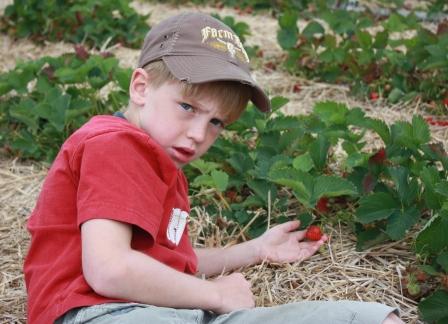
So when Ella and I brought home a flat (eight pints) plus four quarts of berries yesterday, I knew strawberry freezer jam was on the top of my "to make" list.

If you've ever wanted to make homemade jam but you think you can't or you're too busy or you don't have the canning supplies for cooked jam, then freezer jam is for you. It's easy and quick and little fingers can help along every step of the way because there's no cooking or boiling water involved.

To show just how easy it is, I've put together our step-by-step tutorial.

For each batch of jam, you need:

• 4 cups of crushed strawberries
• 1.5 cups of granulated sugar
• 1 45 g pouch of freezer/uncooked jam gelling powder

Yep, that's it.

Step 1: Sort the fruit to ensure there are no mouldy or rotten bits. I can't get her to clean her room but she'll do this without being asked.


Step 2: Wash and hull the berries. Feed the tops to the chickens. You'll be their favourite person Forever.

Step 3: Mash the berries but don't puree them. Wonder what your daughter means when she says, "Mama -- I love to smoosh things." Decide it's not worth investigating further.

Step 4: Measure four cups of mashed berries into a bowl. Ignore your daughter's comment that, "It looks like guts."

Step 5: Slowly add sugar to bowl of berries and gently stir. Agree with your daughter that yes, it does kind of look like quicksand. Resolve to ask your husband what kind of stories he's been reading to the children lately. Allow mixture to stand for 15 minutes.

Step 6: During those 15 minutes, chase strawberry-snatching son out of the kitchen and remind him that although he did just get home from school, it's only been an hour since last snack and he can't really be that hungry, can he?


Step 7: Slowly sprinkle gelling powder into mixture while stirring for 3 minutes. Reassure eldest child that 3 minutes isn't really that long and no, his arm won't fall off from the strain.

Step 8: Allow to stand for five minutes. Then gently stir for one minute more. The jam, not the eldest child.
Step 9: Give starving masses (aka the children) a taste test before they pop with anticipation.
Step 10: Enjoy the two minutes of happy munching sounds. Go back to step 9 - repeat three more times.

Step 11: Ladle into containers, leaving about an inch at the top for the jam to expand in the freezer.


Step 12: Repeat step 1 through 11 until you have enough jam to last until next June (we've got at least one more batch to go). Jam lasts six weeks in the refrigerator and one year in the freezer.


According to the gelling package, this entire process only takes 30 minutes but it took us significantly longer. Of course, we had to make time for some silliness.

Who knew quart containers could make so many things such as...
... hats,
... and beds,


... the Eiffel tower (apparently, lamby passed out due to oxygen deprivation that high up)

... and a super hero car.


What's your favourite super simple preserve?
Related Posts with Thumbnails